Fix It Now — Before It Costs 10× More Later
Every crack, pothole, and soft spot in asphalt started as something smaller. In Ontario's climate — with brutal freeze-thaw cycles, heavy spring loads, and UV summers — pavement deteriorates faster than almost anywhere else in Canada. The key is catching damage early, when targeted repairs cost a fraction of full replacement.
At Alpha Paving Solutions, we handle every type of asphalt repair using the right tool for every job: diamond-blade saws for clean patch boundaries, calibrated plate compactors for proper density, and asphalt lutes for uniform spreading. Here's exactly what professional repair looks like — and why the equipment matters as much as the material.
Why Asphalt Gets Damaged
Understanding the cause of asphalt damage helps you choose the right repair and prevent it from recurring. In Hamilton and the surrounding Golden Horseshoe, these are the six primary culprits:
Freeze-Thaw Cycling
Hamilton averages 50–70 freeze-thaw cycles per year. Water enters cracks, freezes, expands 9%, and pries pavement apart from within. This single mechanism causes the majority of Ontario potholes every spring.
Water Infiltration
Once water penetrates through unsealed cracks, it saturates and softens the granular sub-base — which can lose 50–80% of its load-bearing strength when saturated. The asphalt above deflects, cracks, and collapses.
UV Oxidation
Ultraviolet radiation breaks polymer chains in the asphalt binder, causing the surface to grey, harden, and lose flexibility. Oxidized asphalt cracks far more easily under load and thermal stress — visible as block cracking.
Heavy Loads
Delivery trucks, concrete mixers, and garbage vehicles exert loads far beyond what residential pavement is designed for. Rutting, depression, and fatigue cracking result from repeated overloading of an undersized pavement structure.
Oil & Chemical Spills
Motor oil, gasoline, and de-icing chemicals dissolve the asphalt binder at the surface. Affected zones soften, lose aggregate, and deteriorate into potholes faster than surrounding intact pavement.
Age & Wear
All asphalt has a design life. After 15–20 years without maintenance, the binder dries out, the surface fully oxidizes, and widespread cracking and ravelling become inevitable — regardless of original installation quality.
The Professional Tools That Make the Difference
The quality of an asphalt repair comes down to three things: the preparation of the patch boundary, the consistency of the asphalt placement, and the density achieved through compaction. Each of those outcomes is controlled by a specific professional tool. Here's what we use and why it matters.
Diamond Blade Saw (Walk-Behind Cut-Off Saw)
A walk-behind cut-off saw fitted with a segmented diamond blade is the correct tool for defining a patch boundary. The diamond-impregnated segments grind through asphalt and concrete with extreme precision, producing clean, vertical, 90° walls on all four sides of the repair area.
Why vertical walls matter: asphalt bonds to asphalt along the face of the cut. A vertical edge maximizes the bonding surface area between the new patch and the existing pavement. Irregular, hand-broken edges create gaps, voids, and stress concentrations exactly where the repair will fail first.
We cut at least 6–12 inches beyond the visible edge of the damage into structurally sound pavement. The saw is run in straight lines to create a clean rectangle — never a ragged perimeter following the pothole's natural edge. This single step is what separates a repair that lasts 5+ years from one that fails in a single winter.
The Asphalt Lute (Asphalt Rake)
The asphalt lute — sometimes called a luting rake or asphalt rake — is the hand tool used to spread, level, and grade hot-mix asphalt after it's dumped or shovelled into a repair area. It looks like a heavy-duty landscape rake, but it's built specifically for the temperature and weight of hot-mix asphalt (delivered at 140–165°C).
There are two types in common use: the straight-edge lute, which has a flat blade for screeding a uniform layer to a consistent depth, and the lute rake, which has teeth for moving larger volumes of material and breaking up clumps before final levelling.
Proper luting technique is critical to a quality patch. The goal is a uniformly thick lift — not too thin (which leads to brittle, low-density asphalt) and not too thick (which makes proper compaction impossible). An experienced paver reads the material as they spread it, leaving just enough loose depth that the plate compactor will bring it down to the exact finished grade.
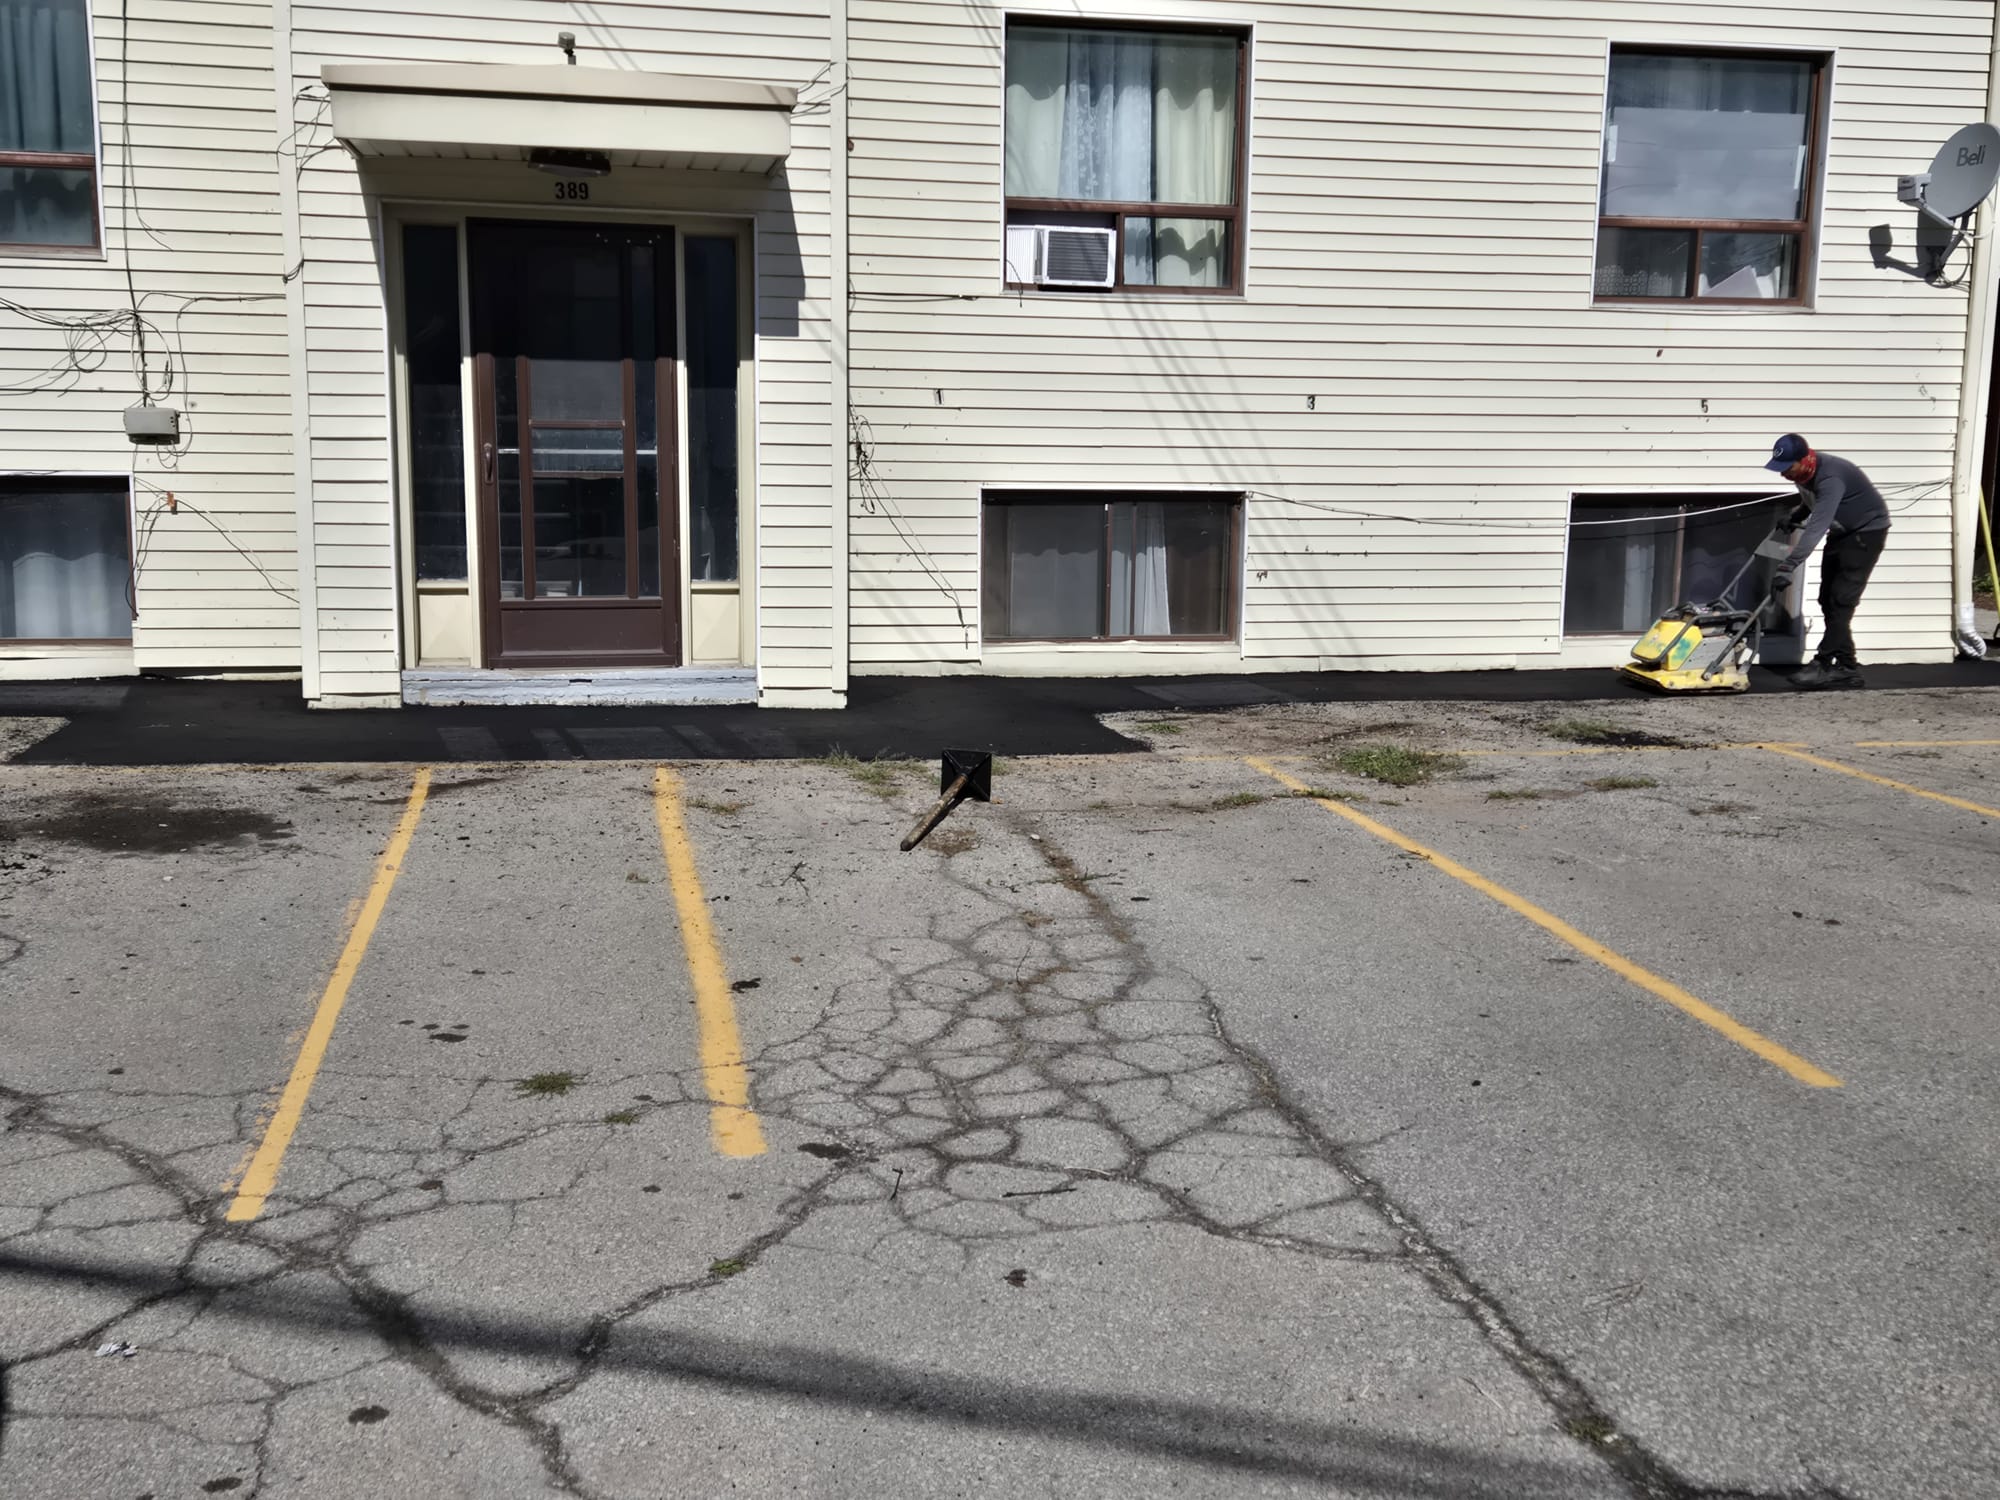
Plate Compactor (Vibratory Plate)
A plate compactor uses an eccentric weight rotating at high speed (typically 5,000–6,000 RPM) to generate a centrifugal vibration force measured in kilonewtons (kN). This vibration is transmitted through the steel base plate into the asphalt below, rearranging aggregate particles into a tighter, more interlocked matrix and squeezing air voids out of the mix.
Proper density is everything in asphalt repair. Under-compacted asphalt has too many air voids — it lets in water, oxidizes faster, and deforms under traffic. Specifications typically call for 92–95% of theoretical maximum density. Achieving that requires the right number of passes (typically 3–5 overlapping passes per lift) and the correct lift thickness (no more than 2–3 inches per lift for a plate compactor).
For larger repairs, we use a double-drum walk-behind roller for even greater compactive effort. Edge compaction — running the plate parallel to the cut edges — is done last to tightly seal the joint between old and new asphalt.
Pothole Repair
A pothole is a bowl-shaped depression caused by the collapse of pavement and base material underneath. Left unrepaired, potholes grow rapidly — water collects in them, accelerating freeze-thaw damage to the edges, and vehicle impact breaks out the perimeter further. There are two primary repair methods:
Hot-Mix Pothole Repair
Permanent — RecommendedHot-mix asphalt (delivered at 140–165°C) is the gold standard for permanent pothole repair. The patch area is diamond-saw cut to clean vertical edges, the failed material removed, the base inspected and repaired if softened, tack coat applied, and hot-mix placed in compacted lifts using a lute and plate compactor.
The result bonds tightly to surrounding pavement and, when done correctly with proper compaction, outlasts the surrounding surface. Hot repairs require above-freezing temperatures (above 5°C) and must go from dump to final compaction before the mix cools below ~85°C.
Cold-Mix Pothole Repair
Temporary — Emergency UseCold-patch is a pre-mixed, cutback-asphalt or emulsion-based material workable at any temperature — including well below freezing. No heating required, making it the only practical emergency repair for winter potholes where a liability hazard must be addressed immediately.
Cold-mix does not achieve the same density or bond strength as hot-mix. It's compacted by driving over it or using a plate compactor, and it will require replacement with a permanent hot-mix repair once spring arrives. Think of it as a band-aid — it stops the immediate problem, but it's not the cure.
Our Pothole Repair Process — Step by Step
-
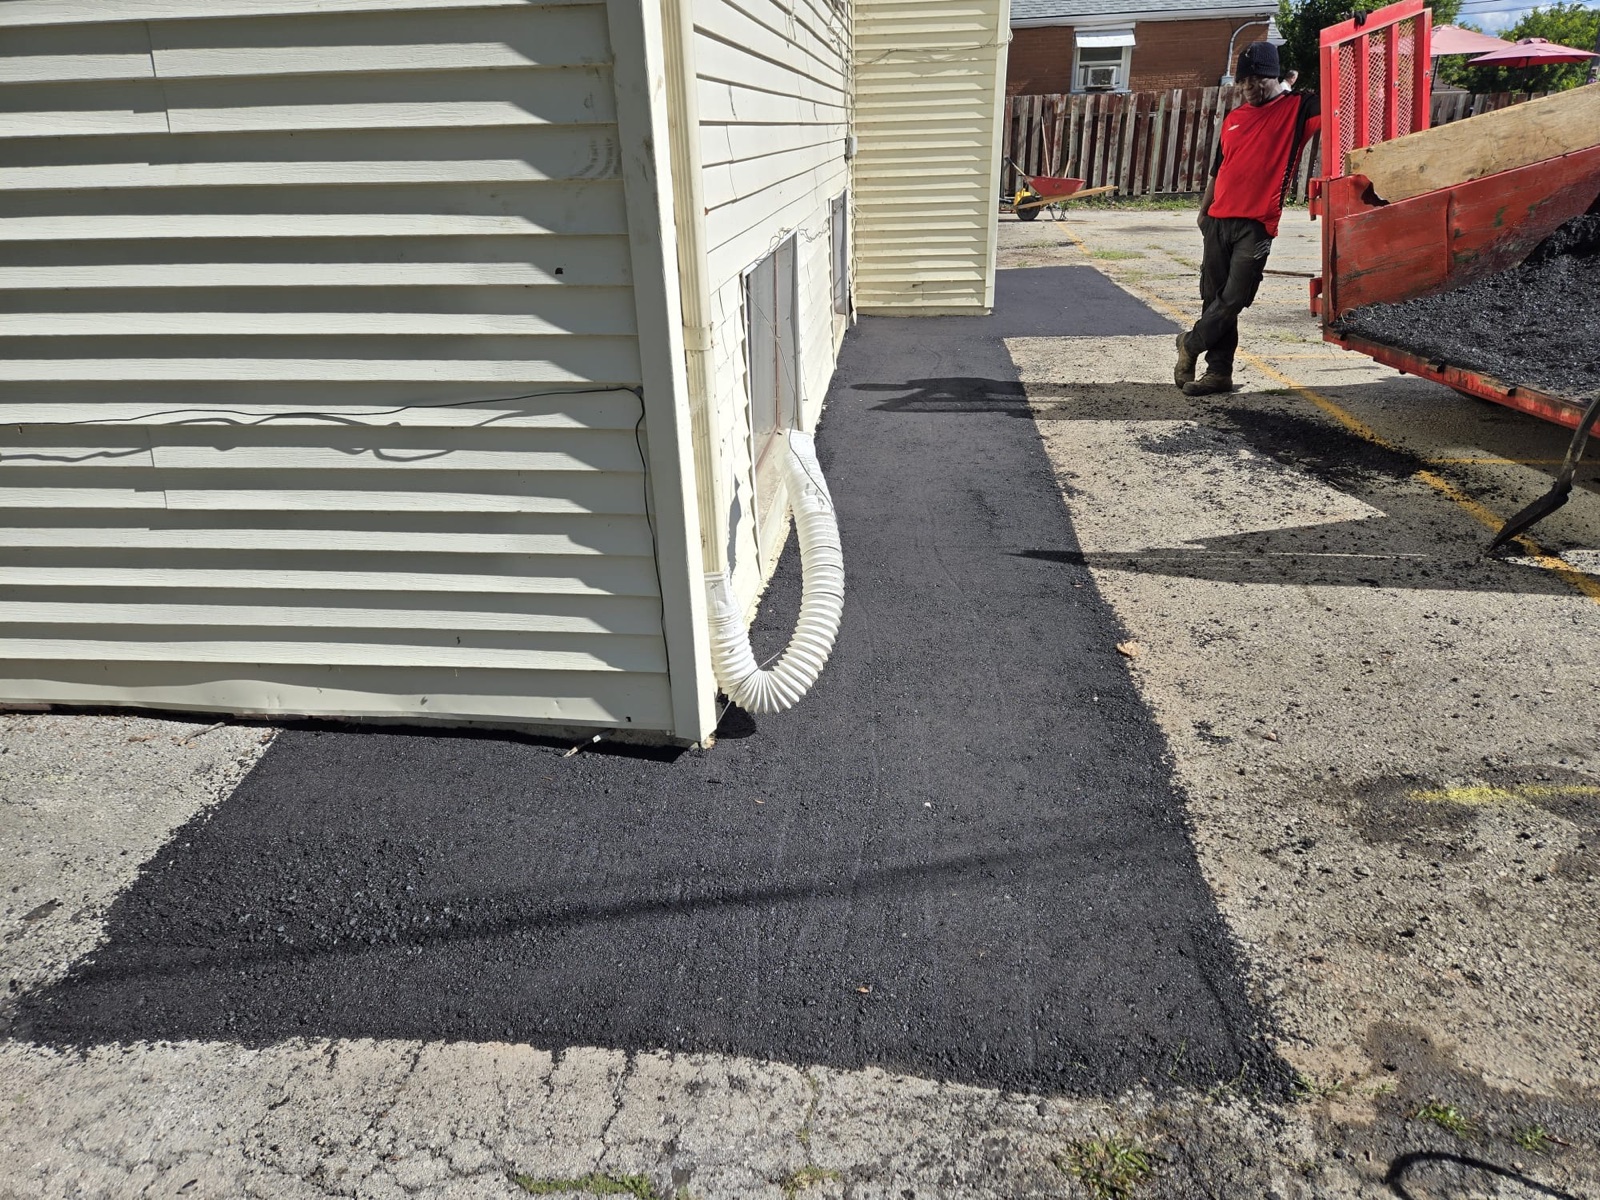
1Diamond saw cut — define the repair boundary We use a walk-behind cut-off saw with a segmented diamond blade to cut a clean, rectangular perimeter around the failed area, extending 6–12 inches into structurally sound pavement on all sides. The saw produces perfectly vertical, 90° walls that maximize bonding surface area for the new material. This is the single most important step most low-budget contractors skip — ragged, hand-broken edges never bond properly and always fail at the joint first.
-
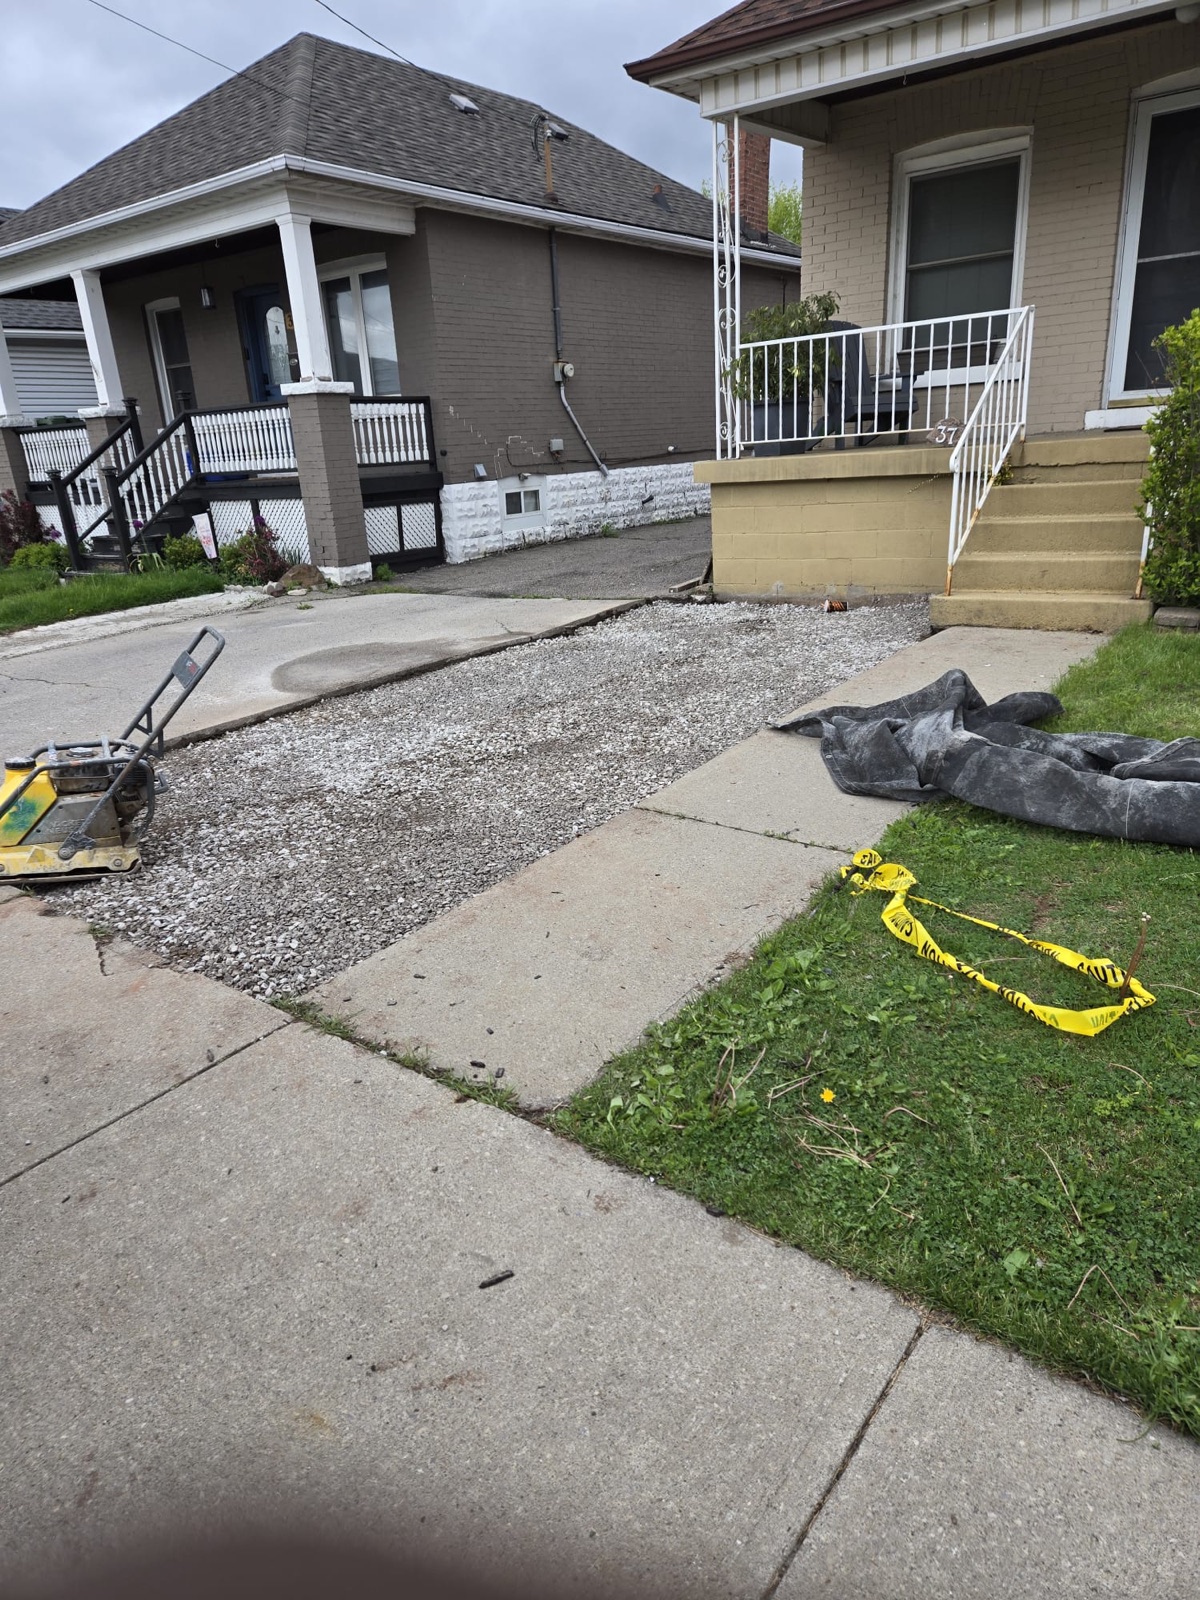
2Remove failed material & inspect the base The deteriorated asphalt is removed with a jackhammer or saw-cut sections lifted out, and the underlying Granular A base is inspected. If the base is soft, saturated, or has washed out (very common in deep potholes), new compacted granular is added and re-compacted before any asphalt is placed. Patching over a soft base is the most common reason patches fail within one season.
-
3Apply tack coat to all surfaces Asphalt emulsion (tack coat) is sprayed or brushed onto all four vertical walls and the prepared base. This adhesive layer chemically bonds the new asphalt to the existing pavement, preventing delamination along the joint — the spot where water most commonly infiltrates a poorly done patch.
-
4Lute the hot-mix to a uniform lift thickness Hot-mix is dumped or shovelled into the repair area and worked with an asphalt lute to a consistent depth — typically no more than 2.5–3 inches per lift. The straight-edge lute is used to screed the material level, checking that no high or low spots exist before compaction. Uneven lifts compact unevenly — thick zones stay under-compacted, thin zones over-compact and may crack. The lute is the tool that sets the compactor up to succeed.
-
5Compact each lift with the plate compactor The plate compactor makes a minimum of 3–5 overlapping passes per lift, working from the edges inward to avoid displacing material at the cut boundaries. The vibration force (15–20 kN on a standard compactor) drives air voids out of the mix and locks aggregate particles together. Each lift is compacted before the next is added. For repairs deeper than 3 inches, multiple lifts are mandatory — you cannot achieve proper density in a single thick pour.
-
6Edge roll & finish The final lift is compacted flush with — or very slightly proud of — the surrounding pavement, allowing for the minor additional compaction that vehicle traffic will apply in the first weeks. The plate compactor makes a final pass along each cut edge to seal the joint tightly between old and new asphalt. This edge pass is critical: an open joint is where water enters first, and where freeze-thaw damage will restart if not sealed.
Crack Sealing
Crack sealing is the most cost-effective asphalt maintenance activity available. Sealing a crack costs a fraction of what it costs to repair the pothole that crack becomes if left open. The goal is simple: keep water out of the pavement structure before freeze-thaw cycles can do their damage.
Types of Cracks — and What They Tell You
| Crack Type | Appearance | Primary Cause | Sealable? |
|---|---|---|---|
| Longitudinal | Long crack parallel to traffic direction | Joint failure, shrinkage, or lane-edge settlement | Yes |
| Transverse | Crack perpendicular to pavement direction | Thermal contraction, reflection from base joints | Yes |
| Edge Cracks | Cracking along the pavement edge | Lack of shoulder support, drainage issues | Yes |
| Reflective | Cracks mirroring joints from layer below | Movement in underlying base or old concrete | Yes |
| Alligator / Fatigue | Interconnected network like cracked mud | Base failure, repeated overloading | No — needs full-depth patching |
| Block Cracking | Large rectangular crack pattern | Asphalt binder hardening / UV oxidation | Partially — depends on severity |
Hot-Pour Rubberized Crack Sealant
Permanent — Industry StandardHot-pour rubberized sealant is heated to 180–200°C and poured directly into prepared cracks using a direct-fire applicator with a squeegee shoe. The material flows into the crack, self-levelling to fill voids completely, and cools to a flexible rubber-like consistency.
The rubber formulation is critical in Ontario's climate — it stretches and compresses with the crack as temperatures cycle from −25°C to +35°C without losing adhesion. Properly applied hot-pour sealant lasts 3–7 years. For wider cracks, we rout first (a diamond saw cuts a uniform U-channel), which nearly doubles service life by providing a proper sealant reservoir.
Cold-Pour Crack Filler
Quick-Fix — Lower PerformanceCold-pour crack filler is a pre-mixed emulsion-based material applied from a bottle or gun-style applicator — no heating required. Practical for small jobs or DIY application, it cures through moisture evaporation over 24–48 hours.
Cold-pour fillers are less flexible than hot-pour rubberized sealants and generally last 1–3 years in Ontario's climate before cracking and re-opening to water. Best used for hairline cracks and as part of a fresh sealcoat application rather than as a standalone repair for wider cracks.
Our Crack Sealing Process
-
1Route wide cracks with a diamond saw For cracks wider than 6mm, we use a crack router — a diamond saw designed to cut a uniform U-shaped or V-shaped reservoir along the crack path. A routed reservoir holds more sealant volume, reduces stress concentration at the edges, and dramatically improves adhesion and service life. Routing adds cost but nearly doubles performance — it's standard practice for commercial work and high-traffic driveways.
-
2Clean with compressed air All cracks are blown clean with a high-pressure air lance to remove sand, dirt, vegetation, and loose asphalt particles. A clean, dry crack is non-negotiable — sealant applied over debris or moisture will fail at the bond interface within months regardless of sealant quality.
-
3Apply hot-pour rubberized sealant Heated sealant is applied from a pour pot with a squeegee shoe, filling the crack to just above surface level. The shoe controls the overband width — typically 2–3 inches on each side — creating a smooth, feathered profile that sheds water away from the crack rather than collecting it at the edge.
-
4Allow to cure before opening to traffic Hot-pour sealant skins over within 30–60 minutes in warm weather. Vehicle traffic should wait 1–2 hours to avoid tracking. Full cure and adhesion to crack walls is achieved within 24 hours. Application in direct sun speeds curing; application in cold weather slows it.
Hot-Pour vs. Cold-Pour: Which Is Right for Your Project?
All Asphalt Repair Services
- Pothole patching — diamond-saw-cut edges, hot-mix permanent repair, plate compactor densification
- Emergency cold-mix patching — winter potholes, immediate liability hazard removal
- Crack sealing — hot-pour rubberized sealant with crack routing for wide cracks
- Skin patching — overlay repair for large areas of surface distress without base failure
- Mill & fill — milling out the failed surface course and replacing with fresh hot-mix
- Full-depth patching — complete removal and replacement in base-failure zones
- Catch basin repair — settling, cracking, and joint failure around drainage structures
- Edge repair — rebuilding deteriorated driveway and parking lot edges
- Post-repair sealcoating — protect your investment immediately after repair
Repair vs. Replace: How to Decide
Not every damaged surface needs full replacement — but not every damaged surface can be saved by surface repairs either. Here's our honest framework:
Repair is appropriate when:
- Less than 25–30% of the surface is distressed
- Base structure is still sound under load
- Cracking is non-structural (thermal, surface)
- Pavement age is under 15–18 years
- Drainage is functioning correctly
Replace when:
- Over 30–40% of the area has alligator cracking
- The sub-base has failed in multiple zones
- Rutting exceeds 1 inch depth
- Pavement is 20+ years old and heavily oxidized
- Drainage problems are widespread
Don't Let Small Damage Become a Big Bill
A crack sealed today costs a fraction of the pothole repair it becomes next spring — and a fraction of the repaving it requires after that. Contact us for a free repair assessment and written quote, typically within 48 hours.
Request Free Assessment (289) 788-1926