Sod is the fastest way to achieve a lush, green lawn — you go from bare ground to a functional turf surface in a single day. But a sod installation is only as good as the preparation work beneath it. Lay sod on poorly graded, compacted, or infertile soil and you'll end up with a patchy, struggling lawn within the first season. Here's what proper sod installation looks like — and what to expect when you hire Alpha Paving Solutions for the job.
Sod vs. Seeding: Which Should You Choose?
Both have their place, but sod wins in most residential applications:
- Sod: Instant results, established in 3–4 weeks, usable lawn in 6–8 weeks. Higher upfront cost but faster and more reliable outcome.
- Seeding: Lower cost, but takes 2–3 months for germination and establishment. Higher failure risk if conditions aren't ideal.
For most Hamilton homeowners who want a beautiful lawn quickly — especially after construction or landscaping work — sod is the clear choice.
Our Step-by-Step Sod Installation Process
-
1Site Assessment & Grading Plan We evaluate the area, identify drainage issues, and plan the final grade. A properly graded lawn slopes gently away from your home's foundation (minimum 2% slope) to prevent basement water intrusion. Areas with standing water problems may require drainage work prior to sod installation.
-
2Old Vegetation & Debris Removal Existing grass, weeds, roots, rocks, and construction debris are removed and hauled away. A clean, debris-free surface is essential for sod to establish good root contact with the soil. We use sod cutters, rototillers, and skid steers depending on the size of the area.
-
3Soil Preparation & Amendment Existing soil is tilled to a depth of 3–4 inches to loosen compaction. Where needed, we add a layer of quality topsoil (minimum 4 inches deep) to provide the root zone sod needs to establish. Soil amendments (compost, lime to adjust pH) are incorporated as needed based on soil type. Hamilton's clay-heavy soils often benefit significantly from topsoil addition.
-
4Starter Fertilizer Application A phosphorus-rich starter fertilizer is applied to the prepared soil before sod is laid. This promotes aggressive root growth and helps the sod establish quickly and evenly. We use balanced, slow-release formulas appropriate for Ontario's climate and soil conditions.
-
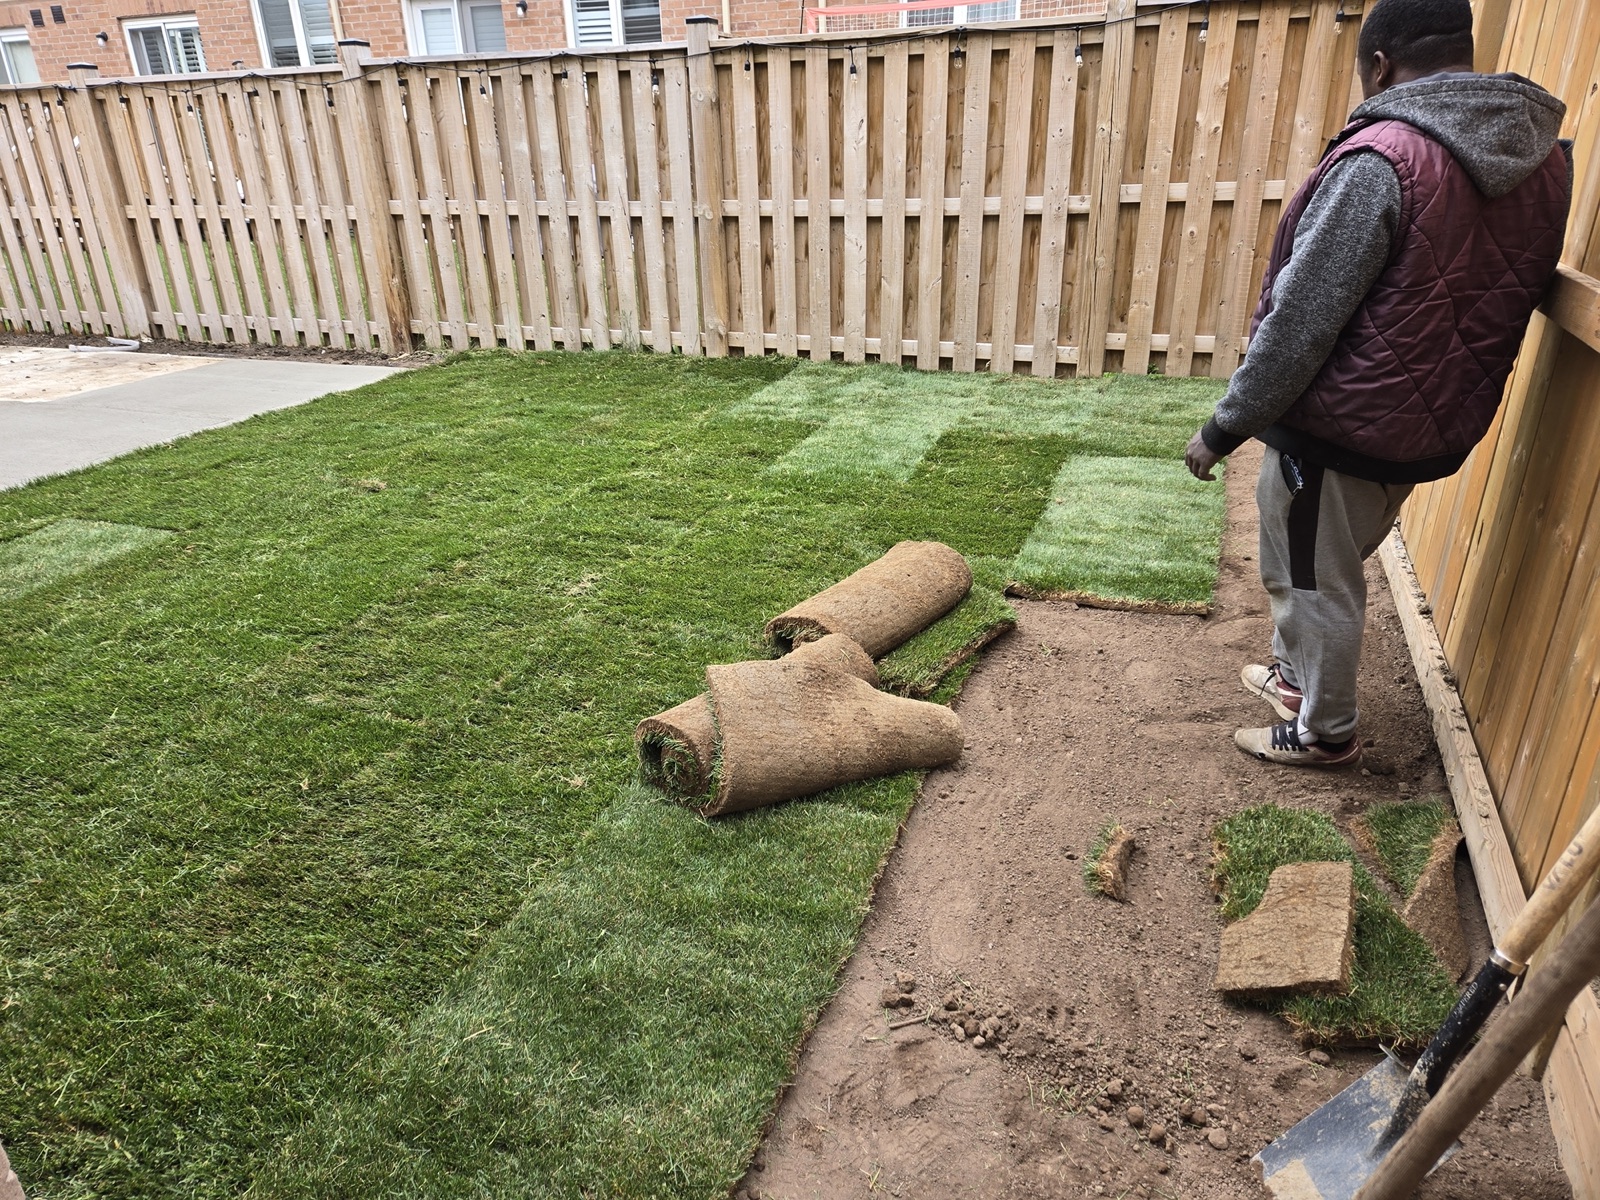
5Sod Delivery & Installation Fresh sod — harvested within 24 hours of installation — is delivered and immediately laid in a staggered brick-like pattern, with seams offset and tightly butted to prevent gaps. Curves and edges are cut with a sharp knife for clean lines around beds, walkways, and structures. Sod is never stretched or overlapped, and joints are pressed firmly to eliminate air pockets.
-
6Rolling to Ensure Soil Contact After installation, the entire sodded area is rolled with a lawn roller to press the sod roots firmly into the prepared soil. Good root-to-soil contact is the most critical factor in successful sod establishment. Air pockets beneath the sod are death sentences for new turf — the roller eliminates them.
-
7Initial Watering The sod is watered immediately and thoroughly after installation — until the soil beneath is wet to a depth of 4–6 inches. This first watering is critical. We advise clients on the watering schedule required for the first 2–3 weeks (typically daily, or twice daily in hot weather) to ensure successful establishment.
Establishing Your New Lawn: The First 4 Weeks
The installation is only half the job. How you care for the sod in the first month determines whether it thrives or struggles:
Week 1–2: Keep It Wet
Water daily (or twice daily in hot weather). The sod must not dry out. You should be able to lift a corner of the sod easily — if it doesn't lift, the roots are establishing. Check soil moisture to 4 inches deep.
Week 2–3: Taper Off Watering
Begin reducing frequency but increase duration — less frequent, deeper watering encourages roots to grow down. By end of week 3, most sod is rooting well and can tolerate light foot traffic.
Week 3–4: First Mow
When the sod has grown to approximately 3.5 inches, it's time for the first mow. Set the blade high — never remove more than 1/3 of the grass blade at a time. Use a sharp blade to avoid tearing.
Week 6–8: Fully Established
By 6–8 weeks, the sod is fully established and can be treated like an established lawn. Begin a regular fertilization program to keep it dense and green.
Best Time to Install Sod in Hamilton, Ontario
Sod can be installed any time the ground is not frozen — typically from late April through October in Hamilton's climate. The ideal windows are:
- Spring (May–June): Cooler temperatures, natural rainfall, excellent establishment conditions
- Early Fall (August–September): The best time of year — cooler temps, less heat stress, still warm enough for root establishment
- Summer: Possible but requires more intensive watering to prevent heat stress
Ready for a Beautiful New Lawn?
We handle everything — site prep, grading, topsoil, sod supply and installation. Contact us for a free estimate for your property.
Get a Free Estimate Our Landscaping Service